- Define a task in your code using
schedules.task(). - Attach a schedule to the task either using the dashboard or the SDK.
A task can have multiple schedules attached to it.
Defining a scheduled task
timestamp- the time the task was scheduled to runlastTimestamp- the time the task was last runscheduleId- the id of the schedule that triggered the taskexternalId- the external id you (optionally) provided when creating the scheduleupcoming- the next 5 times the task is scheduled to run
This task will NOT get triggered on a schedule until you attach a schedule to it. Read on for how
to do that.
Supported CRON syntax
When schedules won’t trigger
There are two situations when a scheduled task won’t trigger:- For Dev environments scheduled tasks will only trigger if you’re running the dev CLI.
- For Staging/Production environments scheduled tasks will only trigger if the task is in the current deployment (latest version). We won’t trigger tasks from previous deployments.
Attaching schedules in the dashboard
You need to attach a schedule to a task before it will run on a schedule. You can attach static schedules in the dashboard:1
Go to the Schedules page
In the sidebar select the “Schedules” page, then press the “New schedule” button. Or you can
follow the onboarding and press the create in dashboard button. 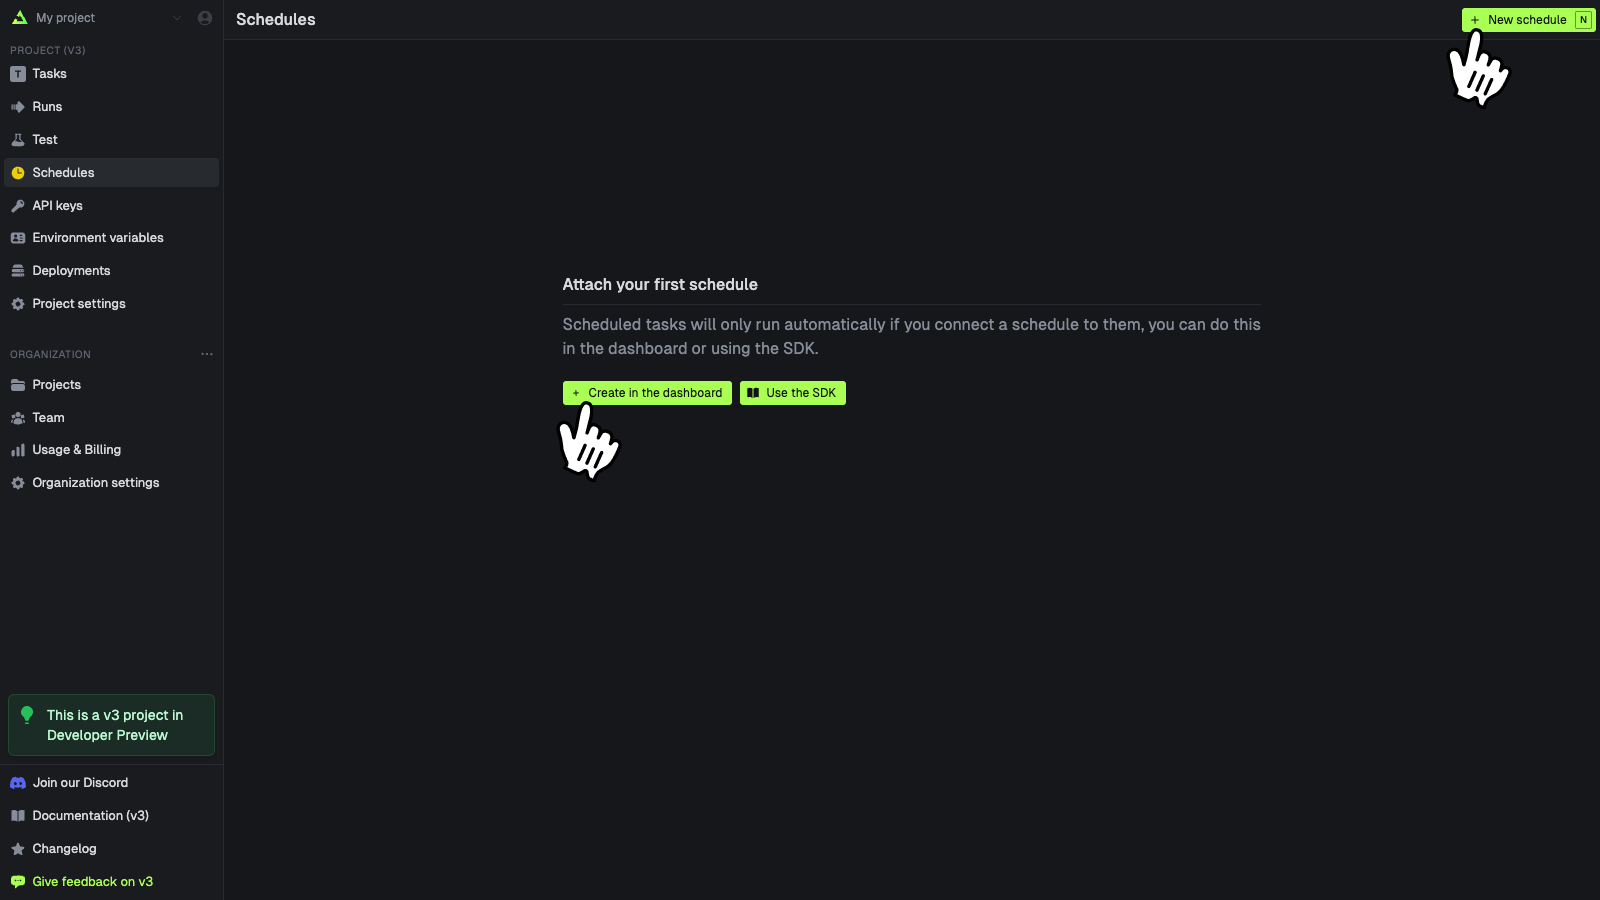
2
Create your schedule
Fill in the form and press “Create schedule” when you’re done. 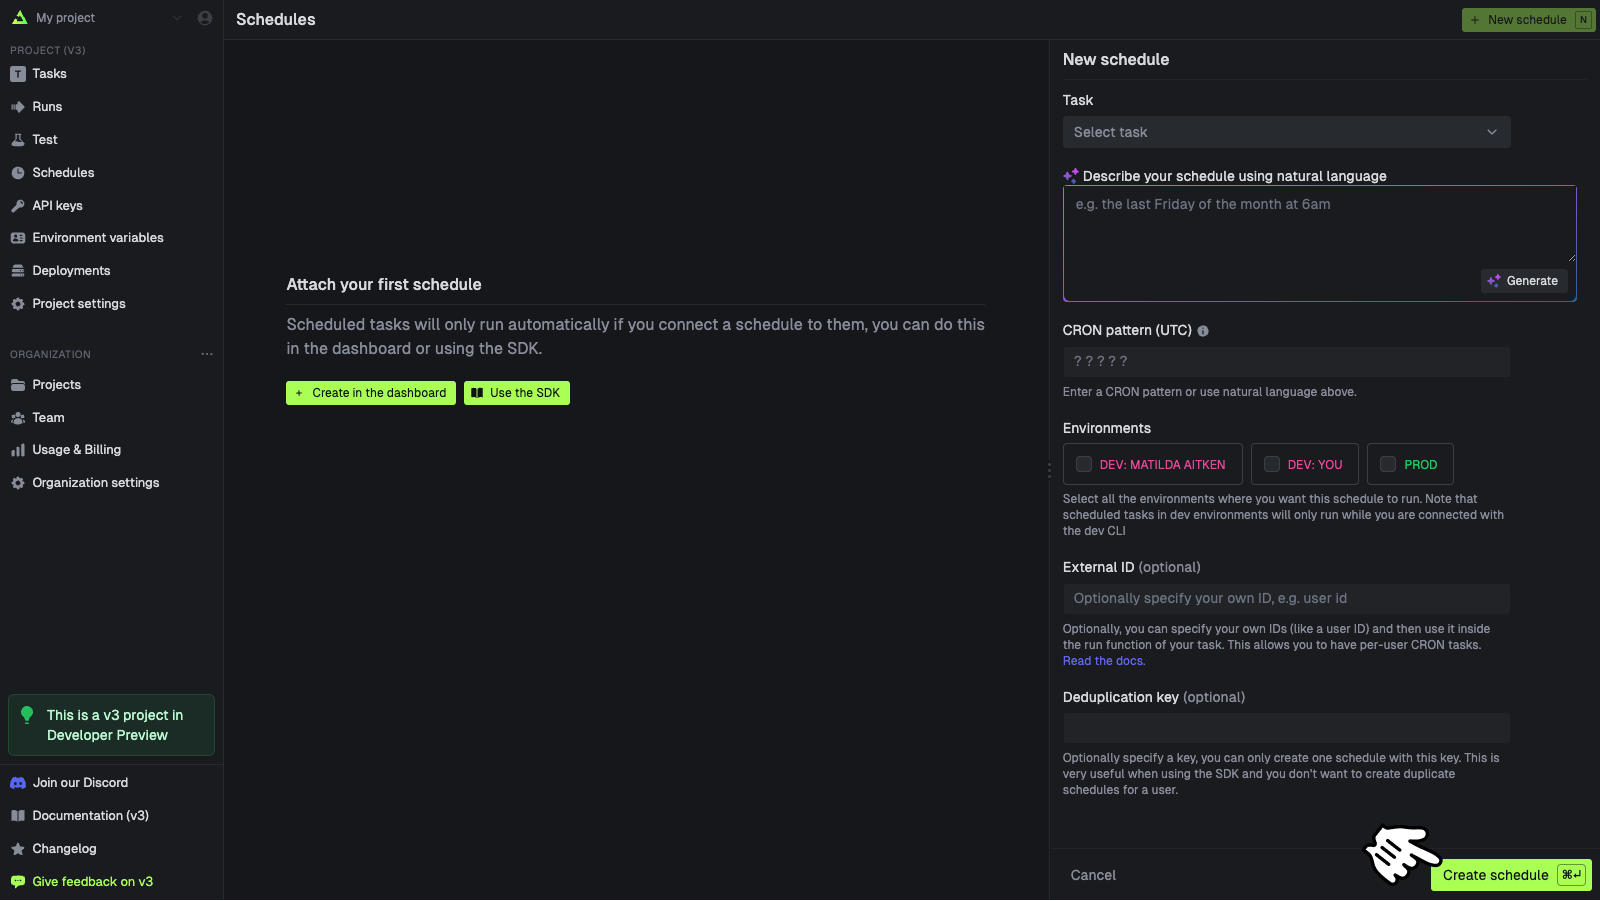 These are the options when creating a schedule:
These are the options when creating a schedule:Attaching schedules with the SDK
You callschedules.create() to create a schedule from your code. Here’s the simplest possible example:
The
task id must be a task that you defined using schedules.task().task, cron, and externalId but only one with the same deduplicationKey.
This means you can have thousands of schedules attached to a single task, but only one schedule per deduplicationKey. Here’s an example with all the options:
Dynamic schedules (or multi-tenant schedules)
By using theexternalId you can have schedules for your users. This is useful for things like reminders, where you want to have a schedule for each user.
A reminder task:
/trigger/reminder.ts
Next.js API route
Testing schedules
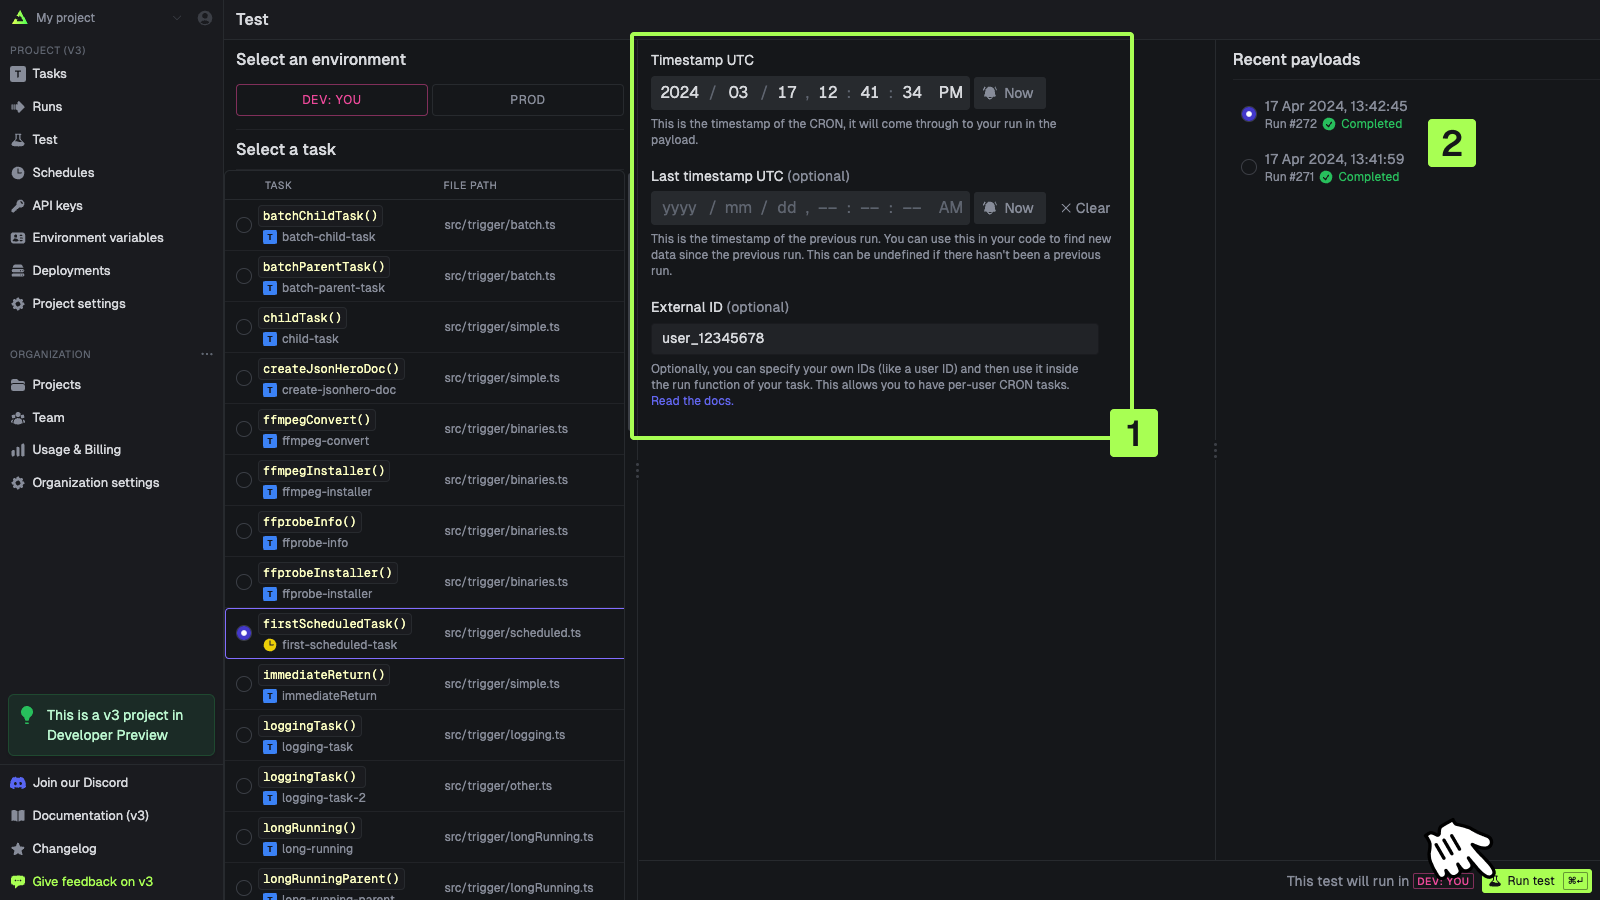
You can test a scheduled task in the dashboard. Note that thescheduleId will always come through as sched_1234 to the run.
1
Go to the Test page
In the sidebar select the “Test” page, then select a scheduled task from the list (they have a
clock icon on them) 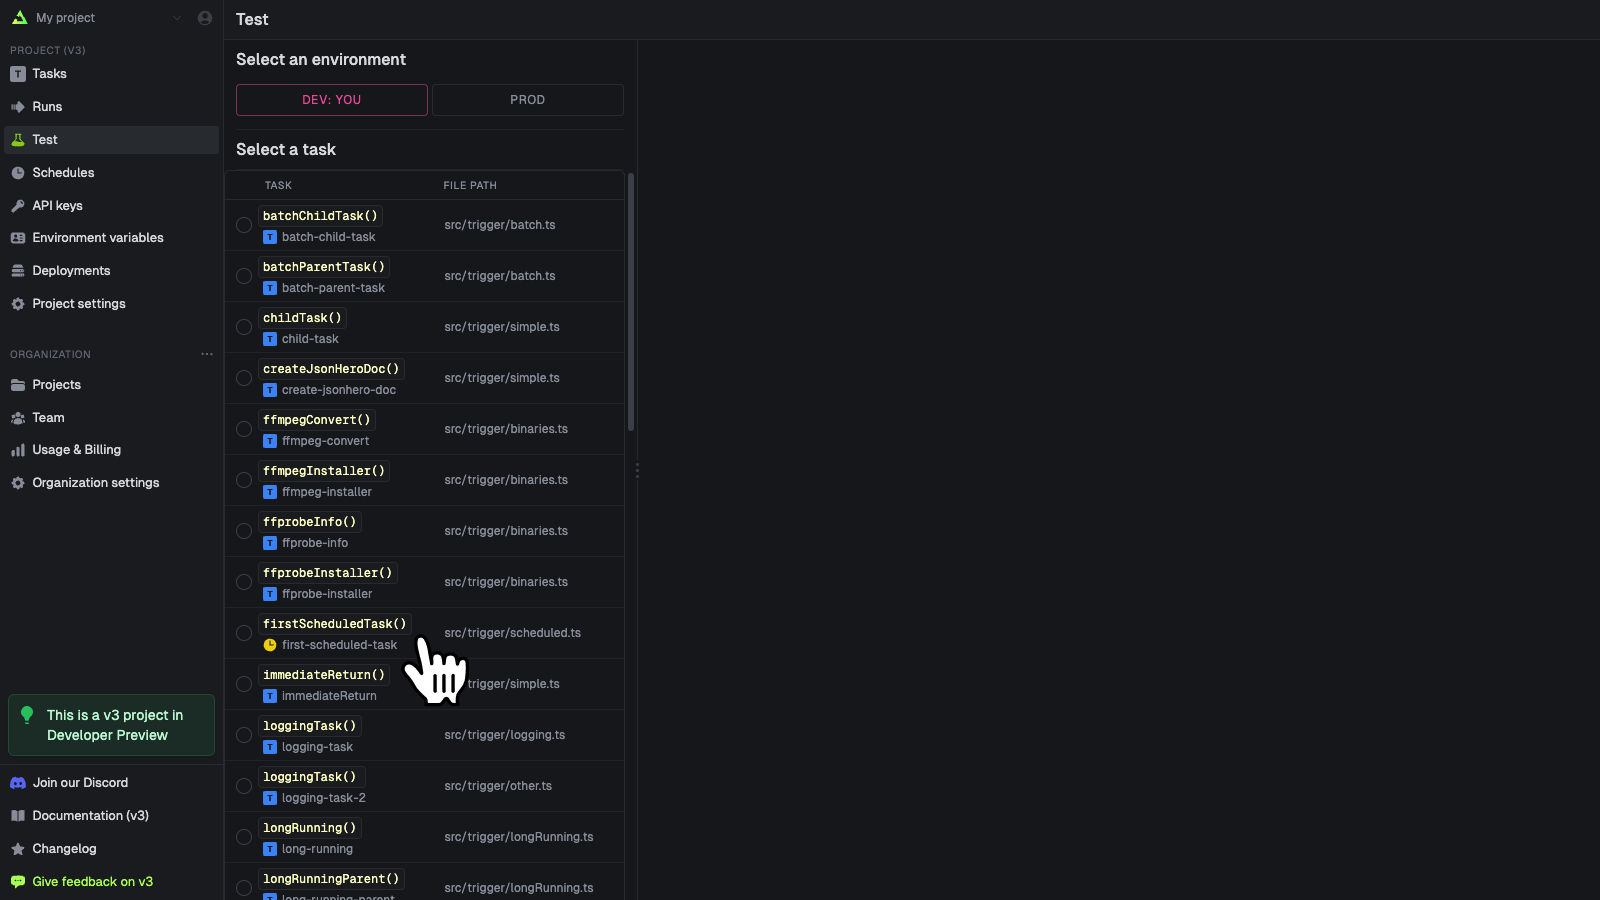
2
Create your schedule
Fill in the form [1]. You can select from a recent run [2] to pre-populate the fields. Press “Run
test” when you’re ready